For many years Debbie has been intrigued by the patterns and symbolism ascribed to knots and netted patterns by different cultures around the world. She is currently creating textiles for her imaginary tribe.
In this interview, which is part of our From conception to creation series, Debbie talks us through the creation of her ‘Snares’ series. We learn which threads she favours, her preferenced knotting techniques and how an impulse buy inspired a body of work.
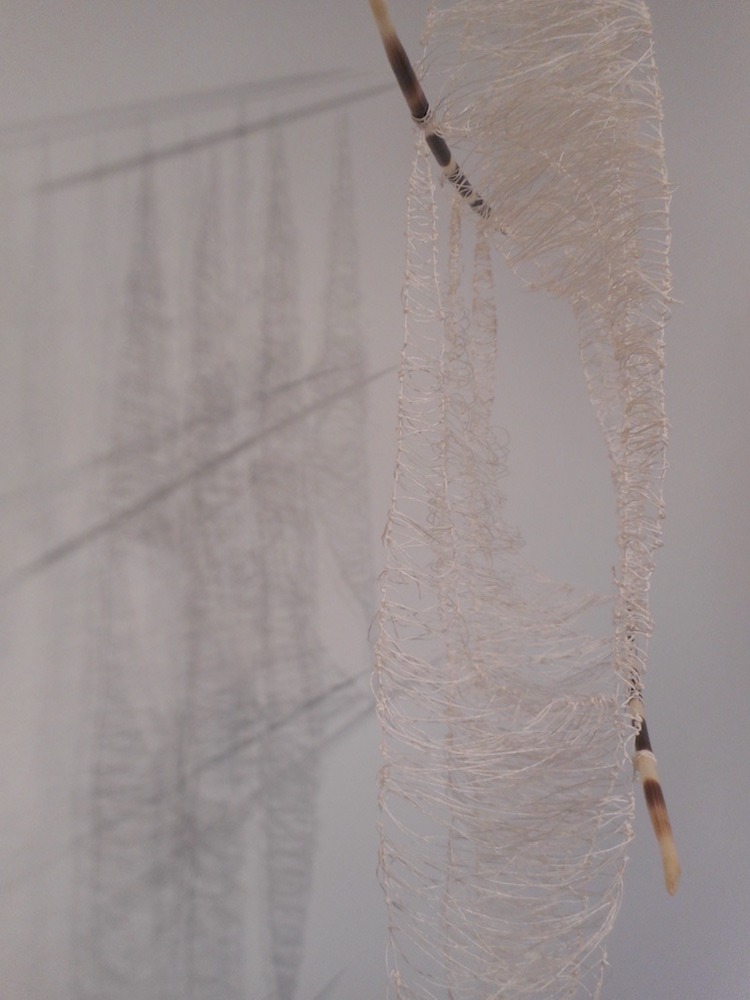
Name of piece: ‘Snares’ Series
Year of piece: 2014-6
Size of piece: 65(h) x 30(w) x 20(d) and 190(h) x 30(w) x 20(d) cm
Materials used: Quills, paper, string
Methods used: Spatial Knotting
Creating intricate devices
TextileArtist.org: How did the idea come about? What was your inspiration?
Debbie White: I am interested in the stories behind the textiles of the world, the construction methods used and the context of their making. The concept of knotted thread as a protective device against evil spirits crops up again and again in many cultures around the world, with elements of ‘magic’ involved in the tying of knots or interlacing of threads.
Sometimes it is the knot itself which creates a trap or a sequence of knots to form meshes to ensnare and confuse. People have created intricate devices to ensnare intangible beings or discourage makers of mischief through the distraction of unravelling patterns of meshed fabric or knotted string.
What research did you do before you started to make?
Revisiting museum collections and referring to my research notes from previous background reading, I examined how structures were made and noted the construction methods and materials used.
My intention is to create my own idea of a ‘snare’ or trap without copying existing artefacts and perhaps causing offence, so I go through a process of collating the information and experimenting with ideas for my structures.
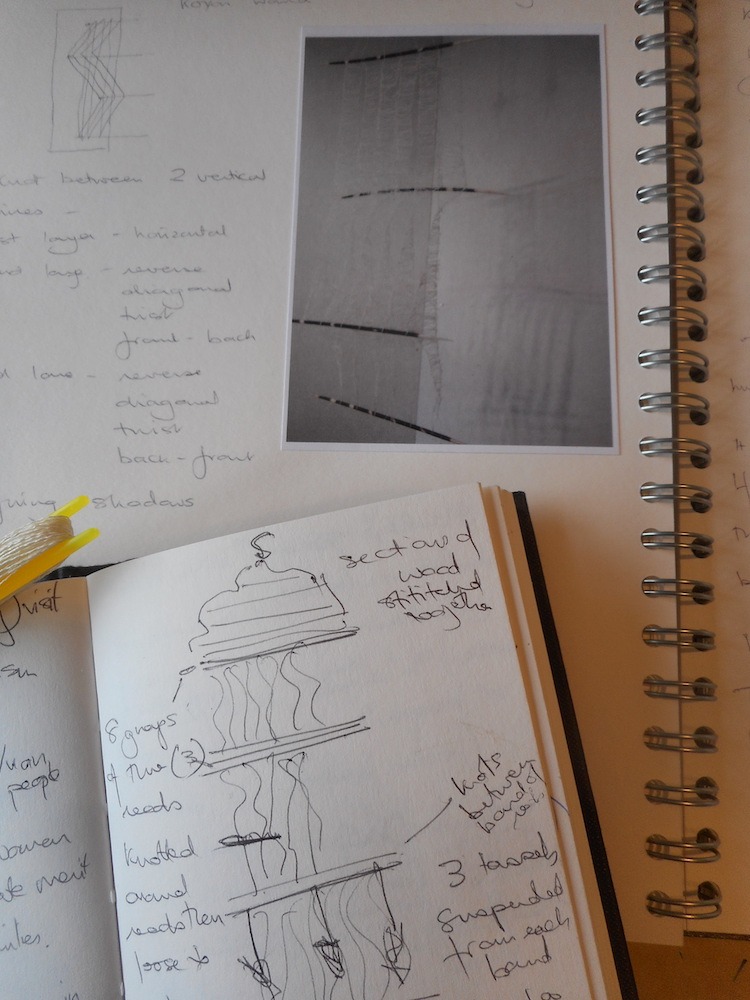
Was there any other preparatory work?
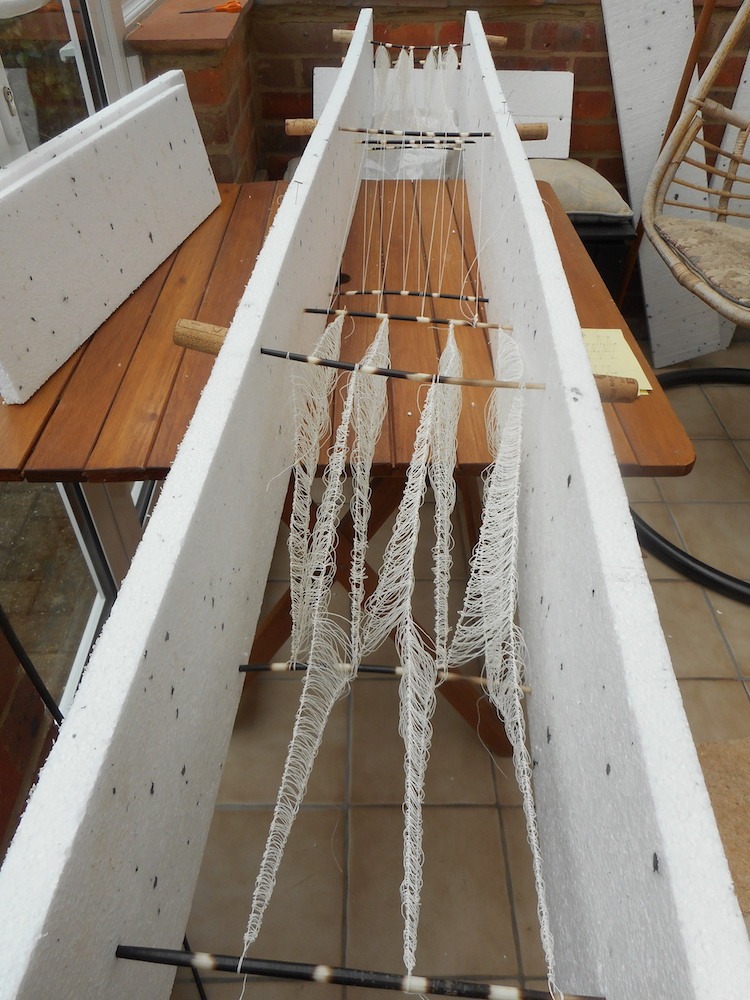
Previously I have used different gauges of string or yarn for my knotted constructions so incorporating rigid sections within the structures was a new experience and my initial experiments with knotting between posts were hit and miss. I soon realised that support for the posts while knotting in between them was essential and this was resolved by poking the ends through sheets of polystyrene.
Happy coincidences
What materials were used in the creation of the piece? How did you select them? Where did you source them?
Much of my work comes together by happy coincidences. I don’t think I am alone in this, my workroom is full of stuff that I have picked up at different shows and suppliers, collected because it might be useful, or received gratefully when a friend says ‘I saw this and thought of you!’
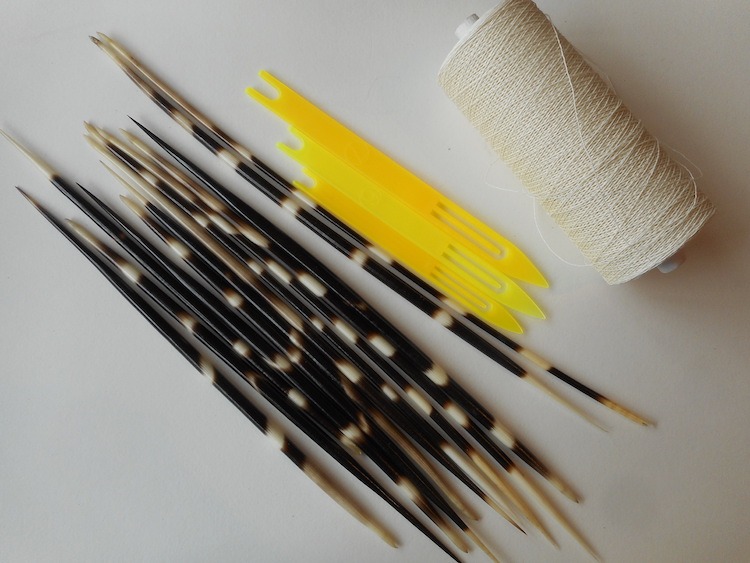
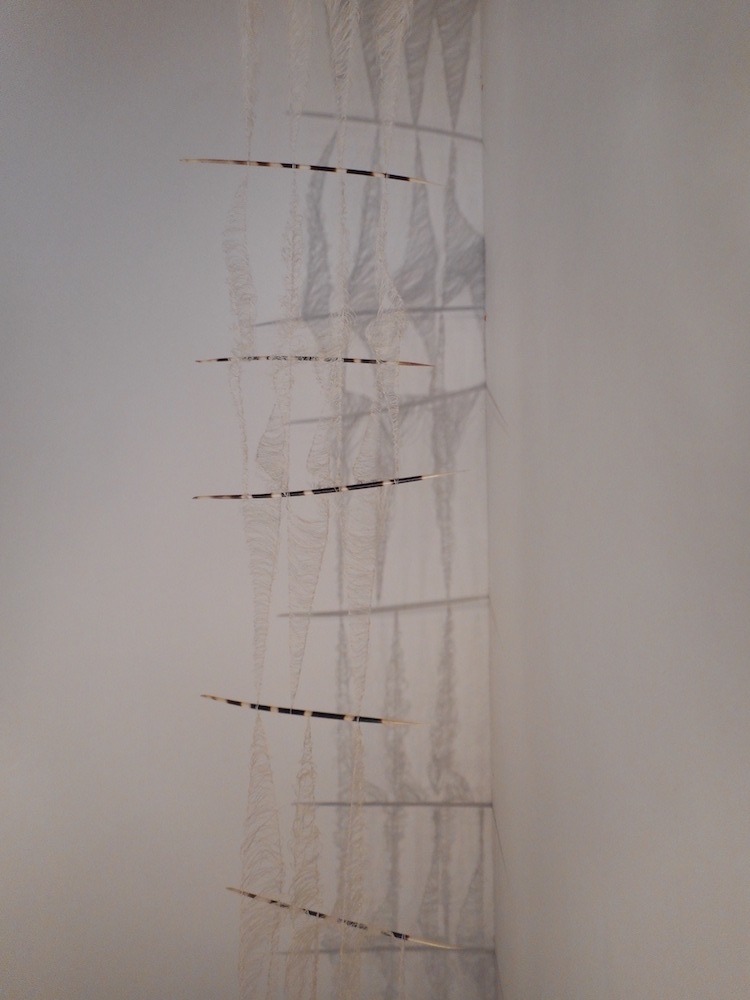
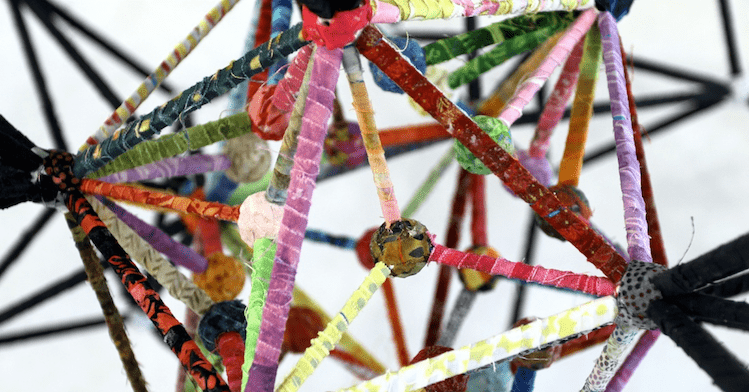
It is amazing what you can find at the Knitting and Stitching Show…a few years ago I picked up a couple of interestingly marked sticks on the African Fabric Shop stand and thought they could be used as a hanging mechanism for finished work. When I asked about them, I was told that they were porcupine quills. They have a lovely individual quality. No two are exactly the same in terms of either dimensions or markings which I like very much. They have a smooth finish, are hollow therefore light so do not pull the threads down and therefore provide a wonderful framework to knot strands of thread between.
One of my favourite yarns for knotting is the fine Japanese paper string ‘kyori’. It has a tight twist and holds itself well when suspended, keeping shape, so would be ideal for this type of structure.
There is a huge potential for frustration with this sort of project because it is difficult to know exact quantities of all the materials you might need. There is no set of instructions to follow as I am designing as I go along and so it is not always possible to get hold of supplies immediately. It did take a while to accumulate enough of the longer quills and for the delivery of yarn from Japan to arrive but my suppliers were really helpful.
What equipment did you use in the creation of the piece and how was it used?
To work on this scale, I needed smaller netting needles in the tighter spaces. The quills are sharper at one end than the other but both ends could get damaged easily so I used pierced corks to cover them. It also prevented me from getting stabbed while knotting!
Polystyrene sheeting from the local DIY centre was useful not just for holding the quills in place while I laced and knotted but also for storing the finished work. It helps to keep shape while transporting too.
Take us through the creation of the piece stage by stage.
Quills are positioned between two parallel polystyrene sheets to create a base for the latticework of threads to be knotted around in a particular sequence from top to bottom. This sequence is repeated in rows across the width of the quills. Once this framework is complete, more threads are knotted across the spaces in between the lattice strands, creating a sort of crosshatching. These threads are loose across the space so there is a certain amount of flexibility and movement, though the knots are secure on the latticework.
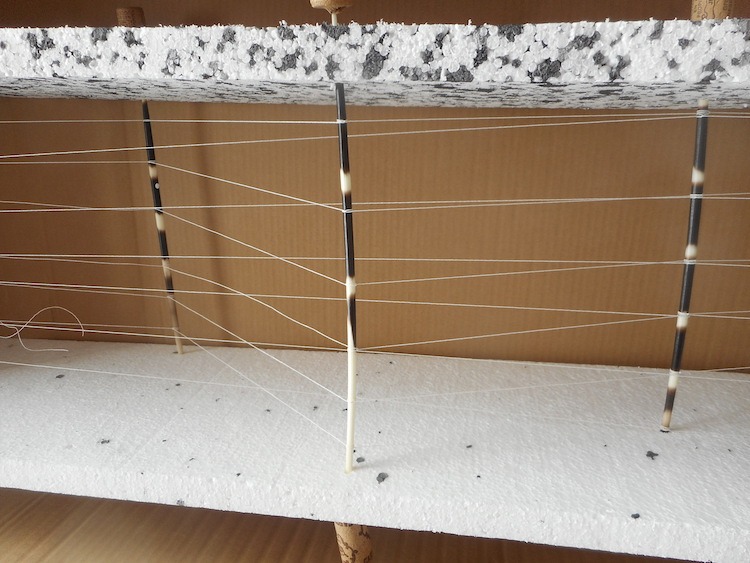
Through different patterns of knotting, I found that working on an angled plane or a combination of planes rather than just horizontally or vertically, as when the polystyrene support is removed the structure sags without the torsion of that variance.
Different combinations of spatial knotting were worked on similar base lattices to see the variation of patterns produced. After playing around with mirror- imaging, reversing or rotating the different single structures, I could then decide which to extend by repeating three times for the larger scale pieces.

The latticework for two of the extended pieces was pretty straightforward and completed in their entirety from top to bottom and in rows as previously described. The third had to be done as two separate stages joined by the third, as the design was more complex.
What journey has the piece been on since its creation?
Some of the small pieces in this series were exhibited at Queens Park Arts Centre in January/February 2016 in the exhibition ‘Trappings’.
With the completion of the extended pieces, the entire body of work will be included in the next Material Space exhibition ‘in_sight’ – details tbc.
I am really excited at the prospect of seeing them suspended all together.
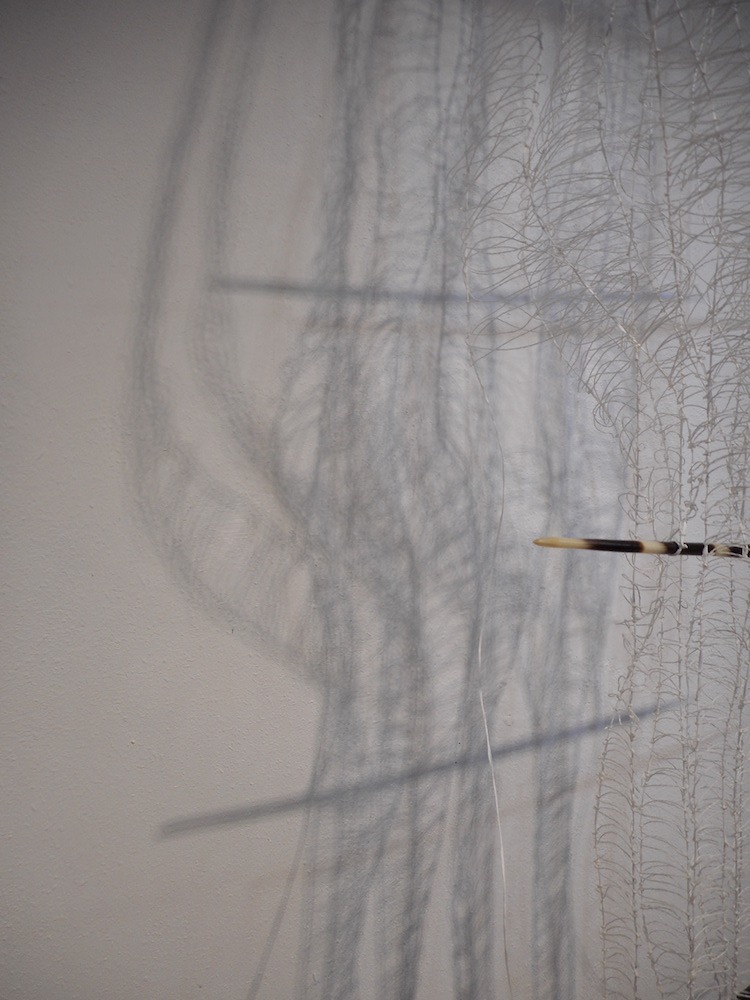
With the right lighting, the threads appear as shadows and vice versa, hopefully creating the required distraction to give protection.
For more information visit: www.debbie-white.com
Got something to say about the techniques, materials, and processes used by this artist – let us know by leaving a comment below.
Comments