All dressed up and no place to go. Such was the quandary for Dr. Jack Roberts when he decided to focus solely upon creating textile fine art. He had a solid foundation of education, experience and skill, but he was stumped: what should he make?
One might think having a variety of possibilities would be liberating and provide the necessary confidence to start creating. But all those possibilities can become overwhelming and stifle artistic movement.
The good news is Jack had a moment of clarity in the most unlikely of places that kickstarted his textile art journey, and he’s been making remarkable art ever since. Jack admits many of his techniques are a bit quirky, including using a scalpel instead of a scissors and dragging his sewing machine outside to work. But when you see his work, it all makes sense.
Jack’s also sharing his experiences with social media and the impact this has had on his journey. His candid insights might inspire you to set up your own art page if you haven’t already.
Enjoy this story about an artist who learns to get out of his own way to let his inner muse take over the presser foot.
So close and yet so far
Jack: When I decided to focus on my own art during the pandemic, I had already completed three degrees: an undergraduate degree in Contemporary Art Practice (Staffordshire University, UK), a master’s in Arts and Museum Management (University of Salford, UK), and a PhD for which I interviewed high-end artists and art dealers about their involvement in the art market (Manchester Metropolitan University, UK).
In addition to my studies, I had also operated as an art dealer, worked as a community artist, and I helped arts organisations with funding bids and evaluation reports. Also, after finishing my PhD, most of my time went into co-running an art centre in Shrewsbury called ArtShack.
Ironically, despite all those experiences and achievements, I couldn’t decide what to make. I had ideas of painting rural landscapes akin to Constable and Rembrandt. But I realised while I could paint to a degree, it wasn’t where my skills laid. Textiles were my thing, especially freehand embroidery.


I had also been working on a body of art about the processes of the art market, the multiple values of art and the structure of the art world, but it was very deep, and viewers would need a comprehensive reading list before being able to understand what my art was trying to say. So, that, too, was set aside. But I still didn’t know where to go next.
Later, whilst walking part of the coastal path of southern England, I was trekking up a very steep hill and I started thinking to myself ‘you are overthinking it – you need to just sew’. I had been stuck in analysis paralysis and wasn’t achieving anything.
When I got home, I started to sew. I didn’t have a plan. I simply cut a piece of fabric, chose a stitch and a thread, and began sewing. I started to fill the fabric with stitch, and after it was about half full, I swapped to another thread. I just kept going.

Meditative stitching
I try to sew every day because I enjoy the process and find it calming. It’s my daily meditation. Some days I’ll sew for eight hours straight, while other days I might just do five to 10 minutes. There’s usually a project on the go that I can sit down to and continue.
I work intuitively because if I sit and think, nothing happens. I get stuck in analysis paralysis. To keep pushing forward, I need to keep making and let the process open new doors. As new ideas come to mind, I use mind maps instead of a sketchbook to record my ideas and thoughts in more of a note-taking process.


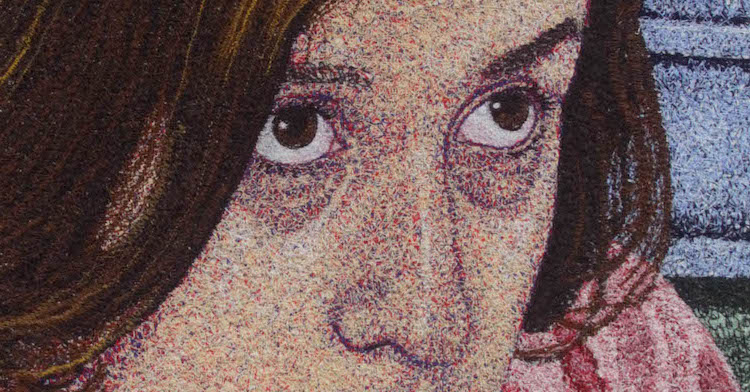
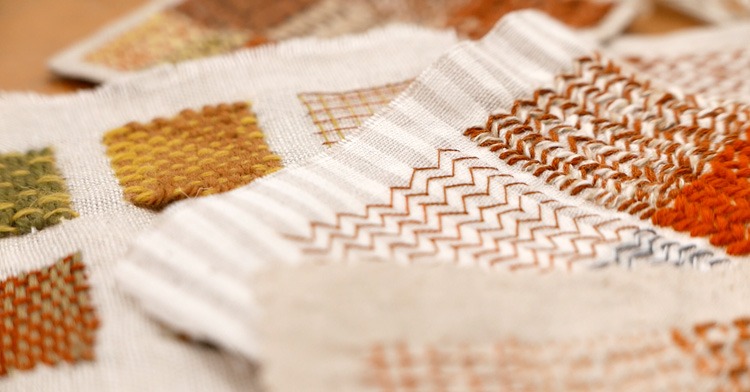
In terms of my actual process, I usually start by cutting two pieces of fabric and then tacking them together with a running stitch. Having two layers helps minimise distortion from the heavy embroidery. I then choose a thread and start zig-zag stitching. I gradually fill the fabric with stitching in an organic way, and when I feel it’s the right time, I’ll stop, pick another coloured thread, and then continue sewing until the whole piece is full. I mostly use two colours, but occasionally three or four.
Ultimately, my art is about the calming experience of making it, not what the piece looks like. So, when the fabric is full, the artwork is finished. In rare circumstances, if I don’t feel the piece is balanced, I’ll cut it and rework it. But that’s maybe only once or twice a year.
I then stretch the sewn fabric onto a piece of plywood, pull it really tight to get rid of any distortion, then staple it into place. The stitched work is then float mounted onto a black-stained backboard.
For my large artwork collections in which multiple individual artworks come together to create a larger piece, the process is slightly different. Those designs need planning, but the designs are still usually based on one of my one-off individual artworks where I felt there was more to explore.
My last step is to title my work. Because my art is about the experience of sewing, I always know when a work is finished: when the fabric is full. But that experience isn’t easily summed up in words, so I originally found myself thinking long and hard about finding the right names for my work.
While doing all that thinking, I jotted down dates on the back of the artworks to keep track. Eventually, I decided to use those dates as proper titles, and I’ve continued to do so since. I think the dates give each work its own sense of time, effectively recording my experience of sewing.


All about the zig zag stitch
My short answer to ‘why only zig zag stitch?’ is texture. It’s the only stitch I’ve used across my own embroidery, as well as when I teach. I find embroidery or decorative stitches can be distorted when using a free-motion foot, and they lose their decorative quality. And there are endless ways in which zig zag stitching can be used.
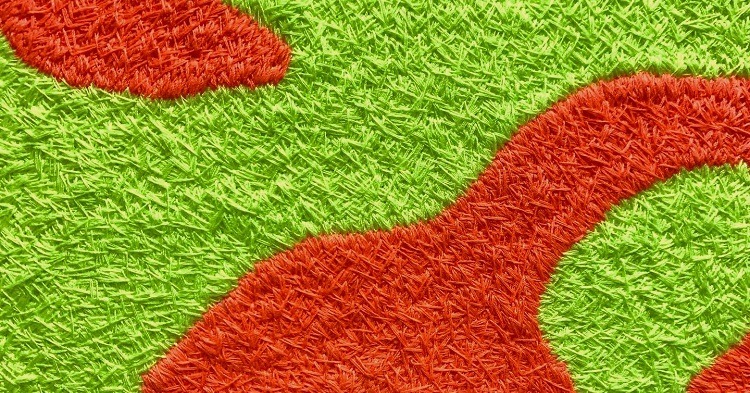
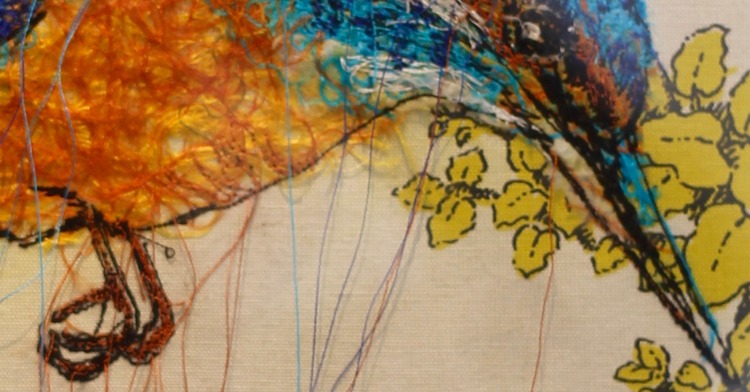
I want uniformity with both colour and depth. Overlapping and changing direction with zig zag stitching allows the stitches to sit on top of each other creating interesting depth and shadows. Viewers can see relief effects from a distance through the colour and pattern, as well as up close through the webbing of stitch.
I also always stitch with two top threads and one bobbin thread. It’s not the easiest process and sewing machines don’t really like it. But the two threads help create the colours I seek. Colour blending in sewing was so much harder for me than painting. I was limited by the colours of thread I could buy. And while I could sew with one colour, change threads, and then go back over and over again with some success, it was a pain doing so.
So, I started using two threads at the same time to better blend and create the colours I really wanted. A yellow thread and red thread can create an orange colour that’s much more vivid than just a single orange thread. Black and very dark grey threads can create a black with some real intensity. It’s also possible to create almost dual colours by combining opposites. For example, black and white threads appear as mottled white and black versus a straight grey.


When I say I use two threads, I mean I put two threads on the top of the machine and then thread the machine normally with both threads going through the same single needle’s eye. It’s a bit fiddly to be sure. I then play with the tension to help avoid threads breaking. If only one thread breaks, the machine gets really tangled.
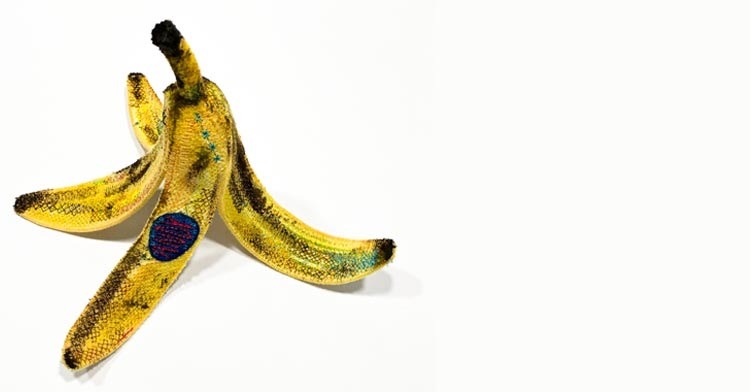
Using two threads also helps me achieve the texture I want in my work. The two threads twist around each other, layer on each other, and sometimes one thread will be caught by the bobbin while the other is not. That all creates incredible texture, which is something I’m very interested in, especially with embossing.
All in all, my process can be quite infuriating, but with that said, it works well for me.
Nothing fancy needed
When it comes to choosing materials and tools, I think it’s important to avoid getting caught up in purchasing the ‘right’ machine or fabric or thread. Artists can find a way to make most things work. It’s more important to find one’s creative voice, and once that happens, all those things will be secondary.
That being said, I mostly use buckram as my base fabric, but heavy interfacing also works well. The fabric needs to be durable. I don’t use an embroidery hoop, so I need a thicker fabric that won’t distort under heavy stitching.
For threads, I’ll use anything I can get my hands on. Many people donate threads to me, and they vary from modern polyester to vintage cotton. When buying thread, I usually purchase overlocker threads because they come in bigger reels. I use so much thread, the bigger reels last longer. The only threads I don’t use are metallic, as they break a lot which gets very frustrating.
My current sewing machine is a Janome Sewist 725s. I usually go for a mid-range model machine. I need to be able to attach a free-motion foot and drop the feed dog, but not much more. I’ve ‘um’d and ah’d’ about moving to an industrial machine with faster speed, but I’m happy with what I have. It suits my rhythm. And because I find the creative process meditative, speed isn’t important.

Free-motion flow
I am totally self-taught when it comes to free-motion stitching. I’ve picked up some tips when speaking with other artists, but I have essentially found my own way. I definitely have some unusual ways of working. For example, I don’t use embroidery scissors to cut threads. I always have a scalpel nearby to use instead. It’s slightly unconventional and a bit dangerous, but I find it easier to work with.
I’m often asked how I deal with tension, broken needles, breaking threads and more. My answer is that it’s all just part of free-motion embroidery. Those things never stop happening, so get used to them. You can try to understand what makes those things happen to help avert them, but it’s essentially just part of the process.
My best advice is to persevere and keep pushing the process. Try different stitches, threads, tensions and needles to find a way of working that suits you. Another important tip is to clean out the fluff and dust from your sewing machine if you do a lot of embroidery. It gets filled fast.
Stitching in the great outdoors
I can’t remember exactly what inspired me to take my machine outside for the first time, but it instantly became a new way of working. It’s a pain in a practical sense setting up the extension lead and carrying the machine, materials and threads outside. I can always guarantee I’ll leave something I need in the studio.
But it’s well worth the effort. The light is so much better outdoors, and it’s just a wonderful experience. It reflects my goal to have my art express the tranquillity, rebalancing and sense of calm I feel when making. Seeing the clouds, having the sun on your face, and listening to the birds over the rattle of my machine has a positive impact on the artwork. I also think the fact I can’t sew outside every day due to British weather makes me appreciate sewing outdoors much more.


Exploring printmaking
I recently started exploring how I could make prints of my stitching. I didn’t want the prints to be photographs, but artworks in their own right. I first experimented with dry point etching, screen printing, gel plate printing, woodcuts and linocuts, but none of them felt right. I then tried inking and printing with actual stitching, and it felt right.
Printmaking is now becoming a very important part of my practice. It’s almost a secondary artmaking process as it comes out of and responds to my stitching practice. Printing is also a reflective tool that allows me to look at my stitchings in a slightly detached way, giving me the space to process thoughts and understand what is important about my stitchings.
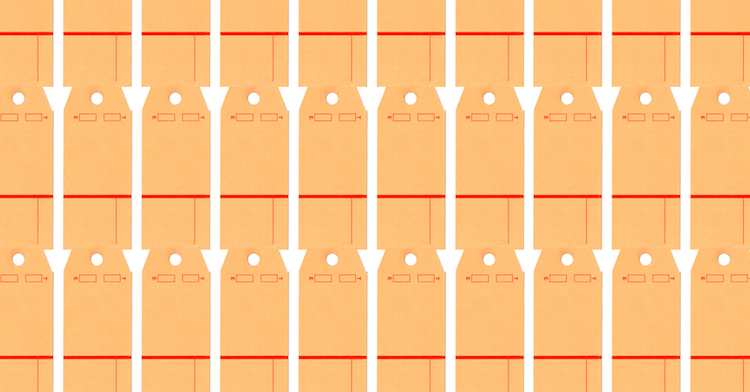
My last run of prints was created from blind embossing. I made a stitching on the sewing machine using my normal method and then covered the stitching with two coats of wood hardener to strengthen the fabric. That turned the fabric into a printing plate that I could run through the press to emboss the wet paper.
The process is definitely still experimental, as it takes a bit of time to get the pressure just right. The ‘plate’ needs to be hard enough to leave a good strong embossing, but not too hard that it rips the paper. Equally, the paper needs soaking just enough to soften it to be malleable enough for embossing, but not too wet that the paper buckles, warps or rips under the pressure. I sometimes feel like the Goldilocks or baby bear of printmaking in my attempts to getting everything ‘just right’.


Thoughts on social media
Years ago, I very rarely showed my art. I might have had a very occasional exhibition or shared my work when teaching or lecturing, but no one ever really saw it. When I decided to make art full-time, I knew I needed to change that, and social media seemed like a good solution that was also free.
Social media was not my thing. I hadn’t ever posted much, and I didn’t like sharing my ‘story’ with the world. So, to form a new habit, I challenged myself to post about my art every day for a year on Instagram, which meant I would need to dedicate enough time to my art to have content to post.
It was really hard and uncomfortable to post at first, but I soon got used to it and even started to enjoy it. It has now become an integral part of my practice. It documents what I do, and it serves as my sketchbook, diary and journal. I also think it’s a form of art in its own right.
At this point, I’ve been posting every day for over 600 days, and I’m convinced it’s the best thing for me. It has created a lot of momentum, interest and sales. It sustains both my practice and energy. Receiving such nice feedback from people makes me feel that what I am doing is worth it.
I also think my posts, especially my videos, help people appreciate how long my art takes to make. They see works being developed over weeks and months, and I think that adds value. I understand why many artists don’t like social media, but Instagram works well for me.


17 comments
Barbara Every
What a wonderful article. I love your pieces and the whole ethos of how you discovered them resonates with me. I love grabbing a piece of scrap material and just stitching, so much to learn from your generous sharing of your practice and as I have just started following you on instagram look forward to your posts. I am a member of stitch club and have benefited so much from the workshops and introductions to many talented people. Thank you so much.
Lindsay
Thank you for sharing Jack. What a wonderful approach to stitching! I loved the double threading idea and the stitching outdoors!
Jack Roberts (JPR Stitch)
Thanks Lindsay! You should definitely try sewing outside, it’s a wonderful experience!!
Carolyn
Thank you Jack this has been an absolutely fascinating read .Really inspiring and refreshing to see how you have evolved and continue to develop your unique textile art .
Jack Roberts (JPR Stitch)
Thank you Carolyn for such a lovely message, I am so pleased that you enjoyed the article. Who knows where my journey will go next but I am sure it will be exciting!
Theresa Clarke
I took inspiration from your interview and tried stitching with two top threads in one needle. What an amazing way to add texture and dimension. Just been using the technique in latest piece of work…
Jack Roberts (JPR Stitch)
I am so glad to hear that Theresa – you can add such texture with 2 top threads and when you start to mix colours too it can create some amazing patterns and colours!
Paula Giovanini-Morris
Inspiring! Thinking outside the box of what traditional machine embroidery is capable of.
Jack Roberts (JPR Stitch)
Thanks so much Paula – machine embroidery is such a versatile process and you can achieve so much with it.
June Pederson
Delightful work. Thank you for sharing your story.
Jack Roberts (JPR Stitch)
Thank you June for your kind words and for reading about my art and journey.
Margaret Sampson
I loved this article as it is inspiring but also wonderful sharing of ideas and techniques . Thank you Dr. Roberts for being so open with your ideas
Mgt Sampson
Jack Roberts (JPR Stitch)
Thank you Margaret for your lovely message – often when you see artists work you only see the end product, for me the process of creating is just as important to share with everyone. I am glad you enjoyed reading the article.
Nancy Hayden
Very inspiring. Especially the part about “just sew.”
Jack Roberts (JPR Stitch)
Thank you so much – I have found that when I don’t overthink, my creativity just flows so much easier!
Jane Axell
This is really different. Loved reading about his work. Well done Mary Carson!
Jack Roberts (JPR Stitch)
Thank you so much, I am glad you enjoyed reading about my practice!