Susan Hotchkis constructs abstract forms ‘fragments’ to highlight the beauty found in the inherent processes of ageing and decay. The core theme of her work is colour, texture and surface, strongly influenced by the Japanese aesthetic of Wabi-Sabi.
Her interest is in the relationship between the natural elements and the man-made, such as that resulting from erosion and human use. Susan says:
Nature has its own way of taking back reclaiming the artificial. It’s the meeting of the two I find interesting. I seek out imperfection, in the insignificant and the overlooked, using a camera to freeze a moment in time, recording marks and surfaces that are in the process of breaking down, ephemeral, in a state of flux.
Susan has exhibited nationally and internationally and has also been featured in several magazines and books. She was selected for Excellence in Fibers in the Fiber Art Now’s Collectors edition journal and exhibition and is currently working towards a solo show.
In this interview, which is part of our From conception to creation series, Susan takes us on her journey of creating Rust-rose, which was short-listed for Fine Art Quilt Masters, 2016.
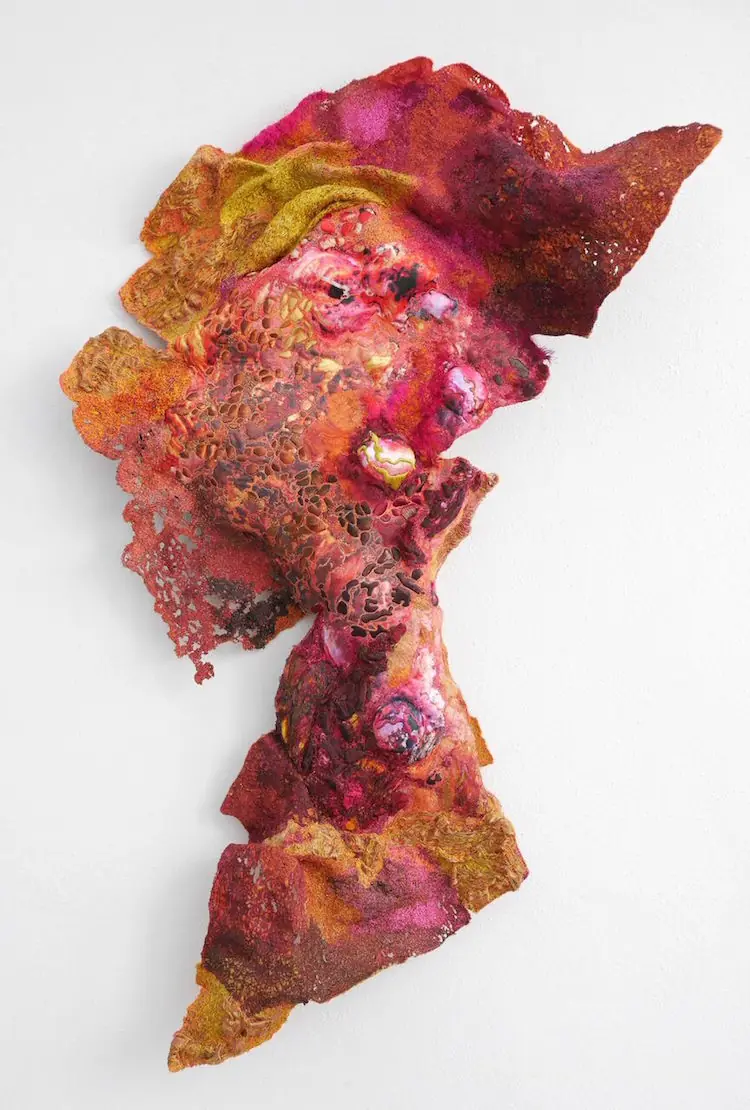
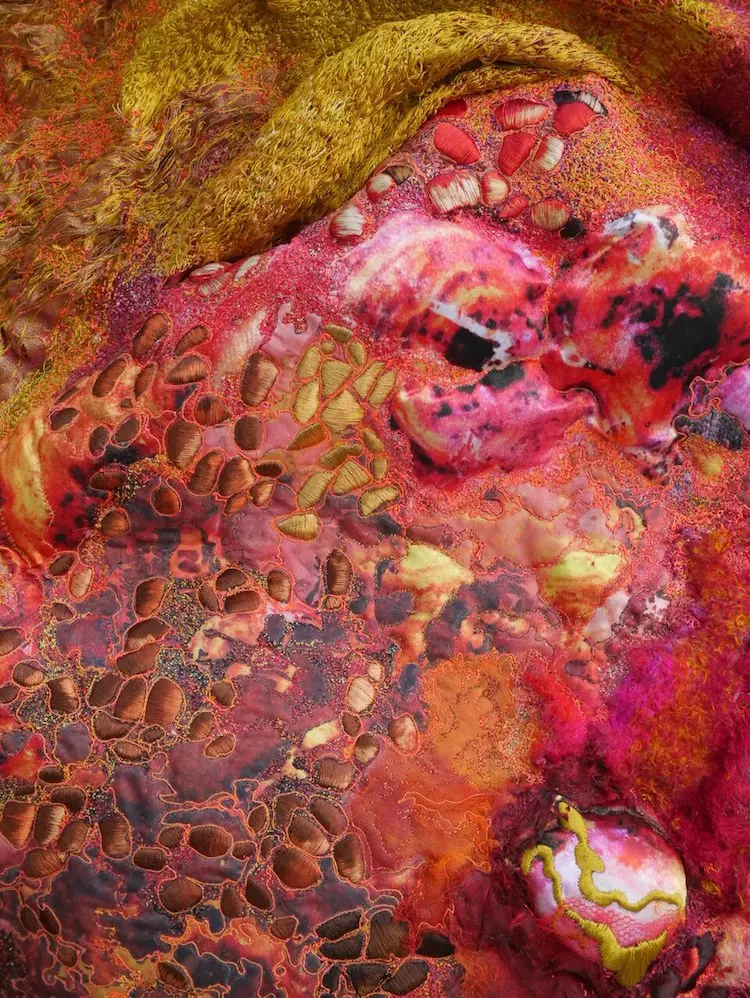
Name of piece: Rust-rose
Year of piece: 2016
Size of piece: H94cm x W 25cm x D 5 cm
Materials used: Felt, Voile, Paper, Digitally printed Satin, Silk, and Threads.
Techniques used: Artists own photographs manipulated using Photoshop, inkjet printed onto paper and digitally printed onto satin fabric. The paper prints were laminated onto voile. Silk was felted using an embellishing machine. Machine stitched and heat distressed. Layered and stitched using free machine embroidery and computerised embroidery with Trapunto quilting.
Perfect decay
TextileArtist.org: How did the idea for the piece come about? What was your inspiration?
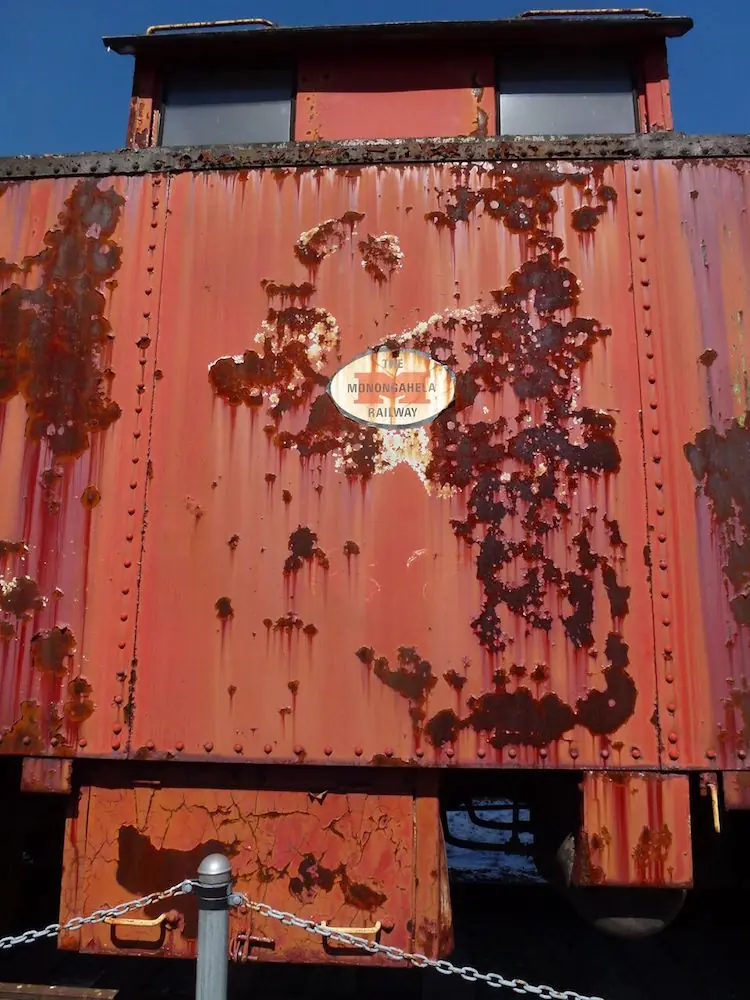
Susan Hotchkis: In 2014 I had work in Art Quilt Elements at the Wayne Art Center in Philadelphia so my husband and I went over for the opening and had a holiday in Pennsylvania; one place we visited was the National Train Museum. Fortunately for me, it had old derelict trains in the process of being restored so they were rusty and decayed perfect for inspirational photographs.
It was bitterly cold that day and the wind was making it below freezing outside but I was determined to get the images and it was from those photos that Rust-rose originated.
What research did you do before you started to make?
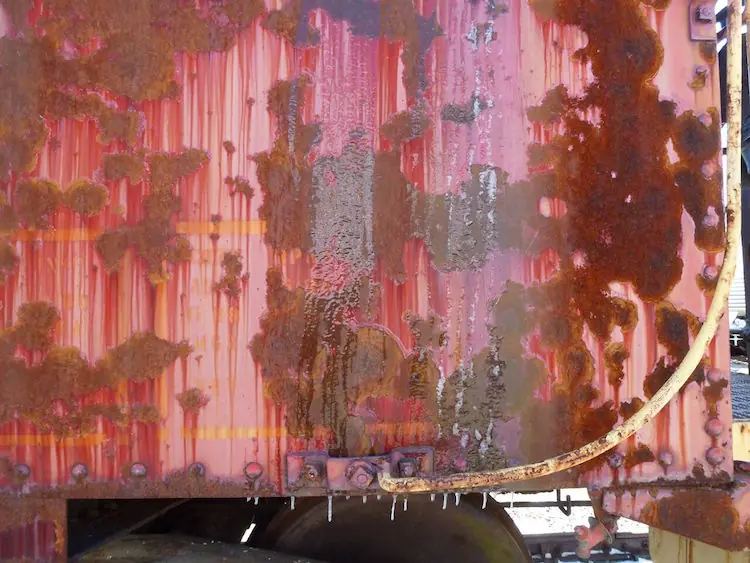
In wasn’t until the summer of 2015 that I began to review the images and play around with them in Photoshop. Zooming in and cropping sections, playing with the colour and tones. These are just two of them and you can see how cold it was as there are icicles on the side of a carriage.
What materials were used in the creation of the piece? How did you select them? Where did you source them?
When I make a piece I like to prepare the materials to work with, to transform materials before I construct with them. It’s very rare that I would use a commercially printed fabric if I do I would change it in some way to make it my own. If I want printed cotton then I will dye it and print it with my own images; if it’s silk I might felt it on my embellishing machine or if it’s synthetic felt, then I might heat distress it and stitch on it.
I have also been using for several of my recent pieces a process called paper lamination which I came across in the book [easyazon_link identifier=”0955164931″ locale=”UK” tag=”wwwtextileart-21″]Paper & Metal Leaf Lamination by Claire Benn, Jane Dunnewold, and Leslie Morgan. This is a process that allows you to transfer paper or in my case paper print outs of my digitally enhanced photos onto a voile sheer fabric.
In my previous work I have often used the processes separately, the pieces on the whole being constructed from the one process but this time I wanted to combine materials.
I was also keen to add another element to my work and explore the use of digital print, especially as my inspiration usually begins with a photograph. So I had various images put onto cloth. Experimenting with scale of image and different types of fabric, satin, and cotton to see which I liked.
Was there any other preparatory work?
I produced several A4 laminated voile samples and then layered them over some of my screen printed fabric and re-scanned them into the computer. I then altered the image using Photoshop and had the results from them digitally printed out onto silk fabric, creating, even more, layers, this time digitally.
What equipment did you use in the creation of the piece and how was it used?
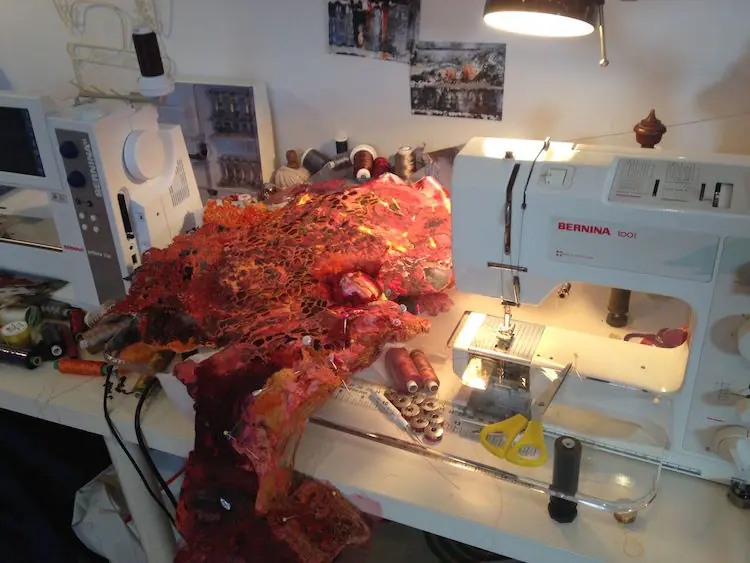
I used the Bernina 730e and a domestic [easyazon_link identifier=”B0037IPE0S” locale=”UK” tag=”wwwtextileart-21″]Bernina 1001 machine and the Pfaff Smart embellishing machine
Take us through the creation of the piece stage by stage.
Once I had produced enough fabric to work with i.e. my digital prints and laminated voile I began to cut and piece them together, laying them on top of each other, working intuitively. Being careful as to where I pin, as the laminated paper isn’t forgiving because pin holes remain in the paper. The laminated paper was matt and the digital prints were silky, I liked the contrast between the two.
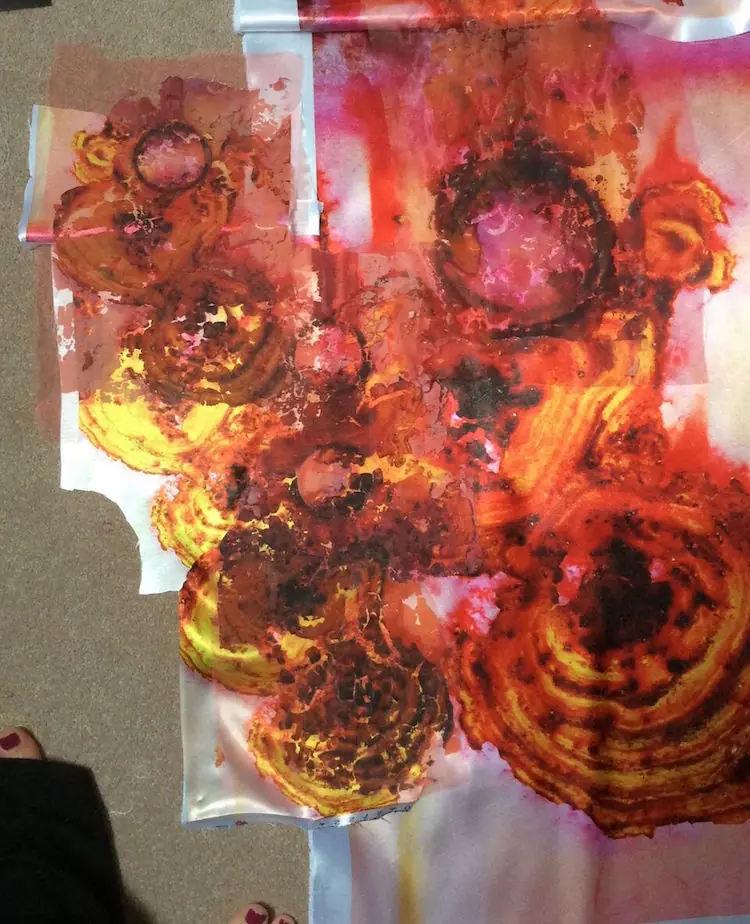
When I work I take a quick snap of each stage on my phone or iPad that way if I can’t remember how it looked before I moved something I can go back to it. I came up with several large arrangements and began to develop one section in particular on the left-hand side by stitching the layers together. Later I cut the piece into two and I kept the remaining pieces aside to use in another piece.
It was stitched at first with some simple lines on the domestic sewing machine to hold the layers together and then I added further marks by using the Bernina 730e.
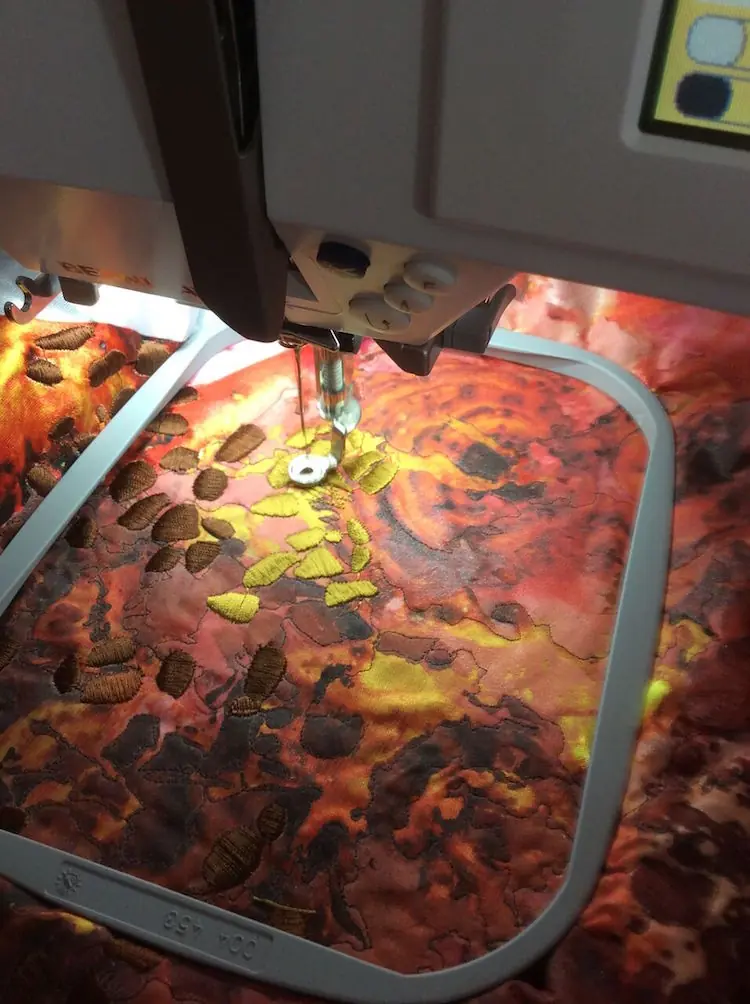
I drew a sketch of how I wanted the stitches to look inspired by the crackling and peeling paint in the original photographs; then scanned it into my computer and selected the type of stitch I wanted and sent the design to the [easyazon_link identifier=”B0037IPE0S” locale=”UK” tag=”wwwtextileart-21″]Bernina 730e and stitched onto the fabric. This might sound very easy however it’s quite fiddly as you can only do fairly small sections at a time and have to move the fabric about in the hoop. It’s time-consuming and the machine can be very sensitive and the thread can break etc, so you have to keep a close eye on it. Also if it goes wrong I can’t redo it as the paper retains the stitch marks. So it can a quite stressful.
After I added a thin layer of wadding underneath to raise the stitches and free motion stitched around the computerised stitches to add another texture and highlight the stitches.
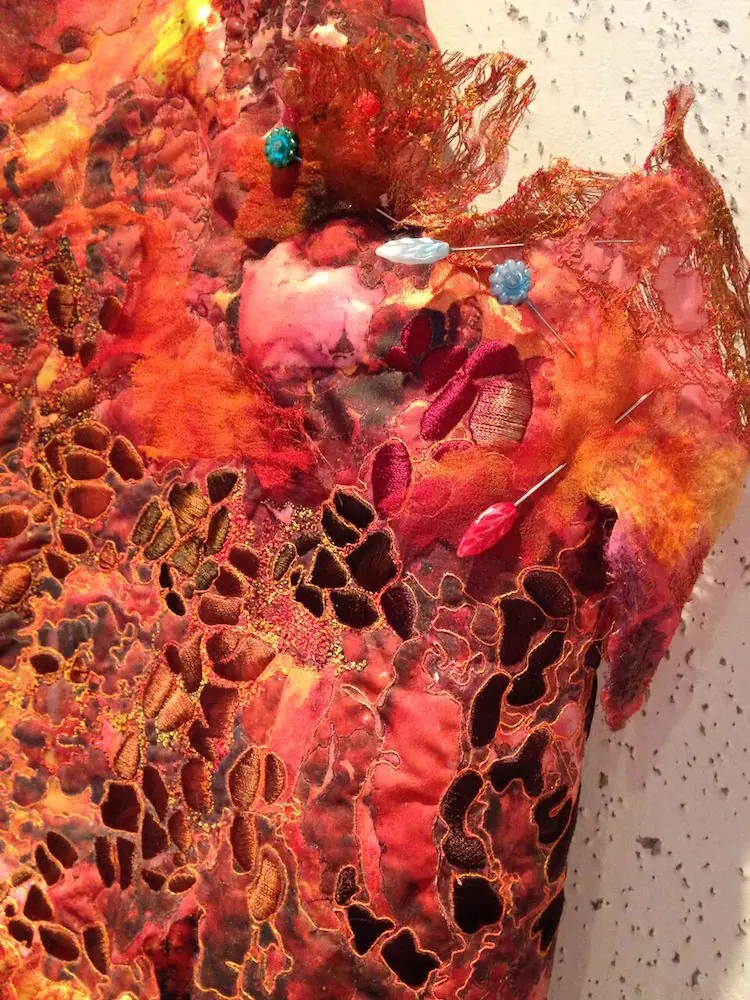
In the photo below you can see that I’ve added another small layer of chiffon and begun to build up the right-hand side by adding more laminated paper/voile that has also been stitched and heat distressed. I then began to work on its form, pinning it to the wall and playing with sculpting the shape.
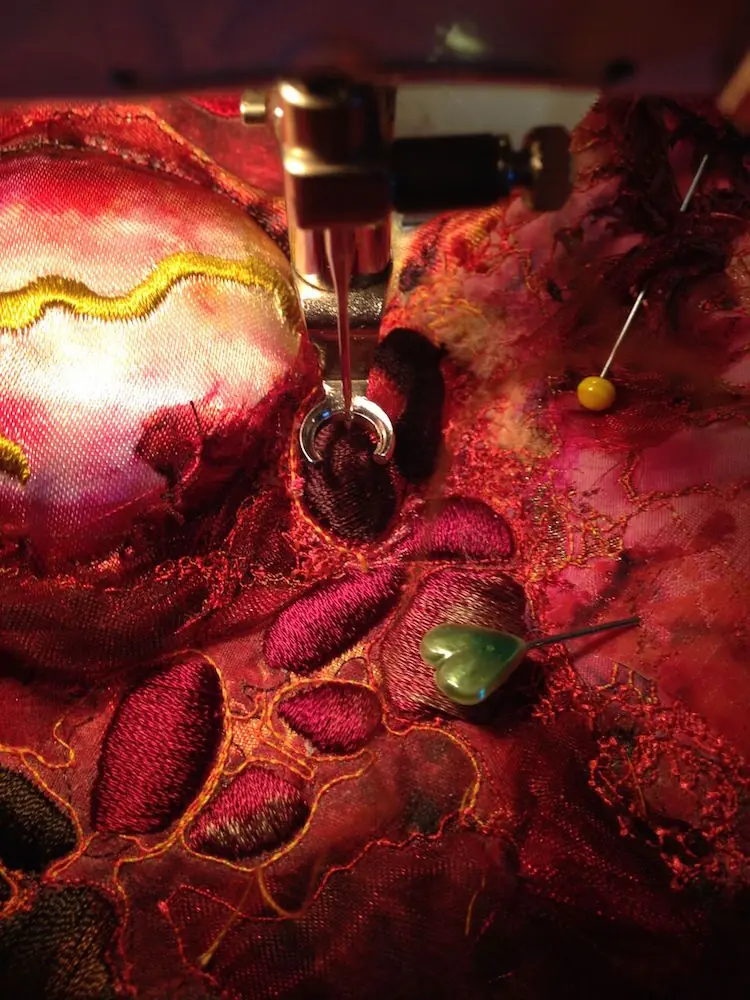
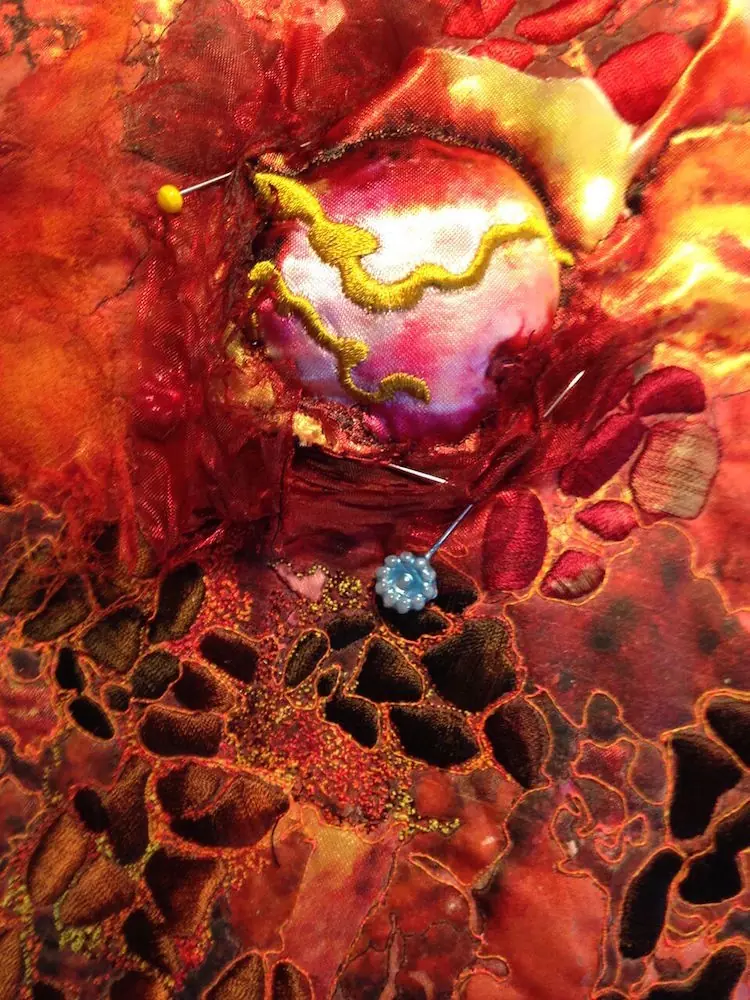
The circular rivets in the top right were flat and I wanted this to be raised so I took a separate fabric digital print of a rivet and embroidered onto it before layering and then Trapunto quilting. I then set about inserting it into the whole piece. This is when it can become tricky using the machine as you don’t want to catch the existing embroidery and snag it with the needle. It was part hand stitch, part machined into place. Three rivets were eventually added in this way.
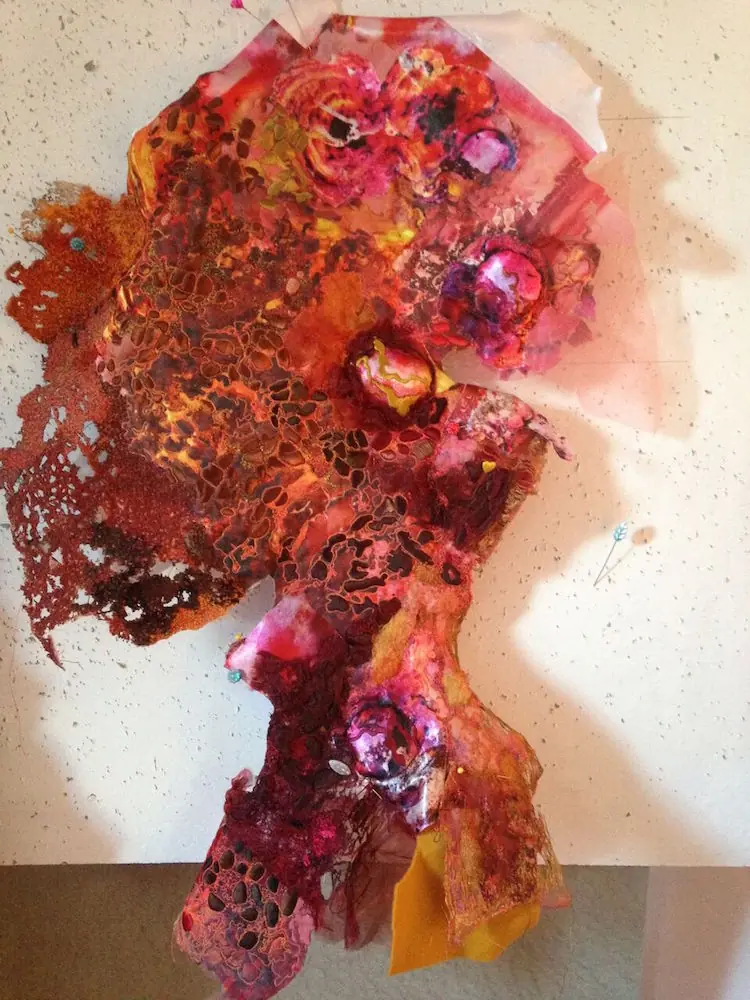
I then continued to build up the piece. I would often add fabric and see if it worked by pinning and then taking a photo. So there are several outcomes and versions, too many to show. In this next photo, you can see how I’ve added stitched and heat distressed felt on the left and begun to explore its shape further by adding fabric to the bottom. It was going to have a hole in the bottom section but in the end, I decided against it and completely changed the bottom section to how it is now.
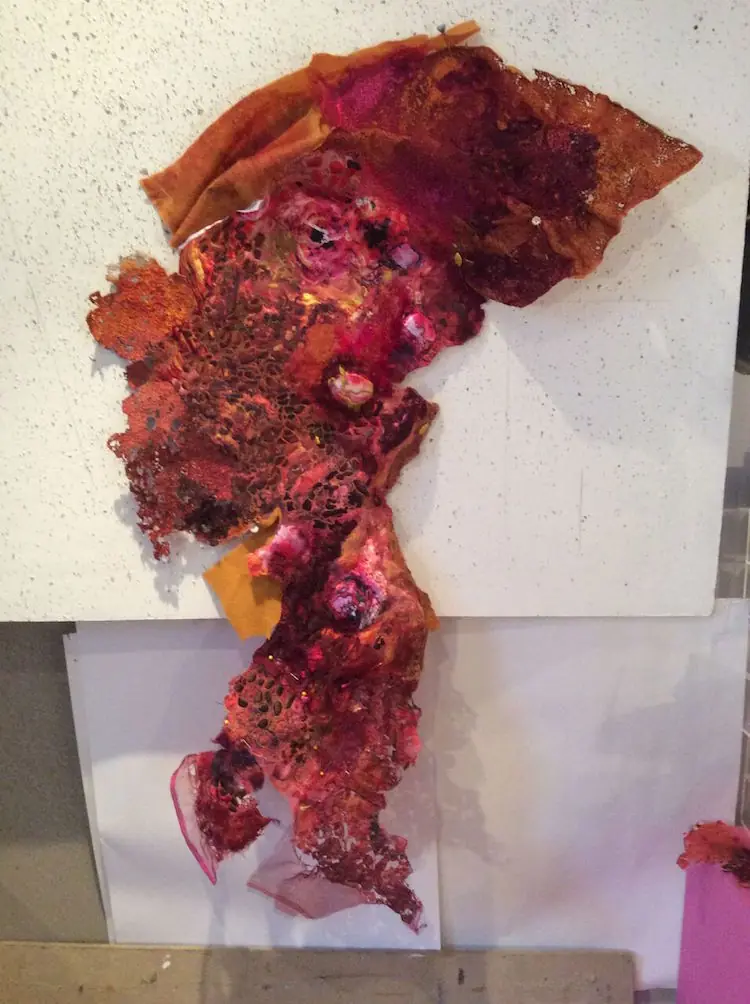
In the meantime, I began thinking about the top section. I had already tried pinning yellow quilted digital prints along the top but this wasn’t working for me. I wanted it to feel distorted crumpled and bent but also round, echoing the rust shapes in the original photos. So I placed felt along the top and shaped and manipulated it until it felt right I began to stitch onto the felt using free motion stitch.
Heat distressing and layering with voile and densely stitching. When adding the felt I Trapunto quilted more areas of the digital print in the main section and folded and gathered the felt on the top. Trapunto quilting allows you to raise small sections by stuffing an enclosed shape with wadding. I free motion stitched to hide any joins and to make the sections seem as one. It can be quite difficult to get the piece under the machine and to remember to do all the stitching before stuffing as you can’t stitch on it once it’s padded.
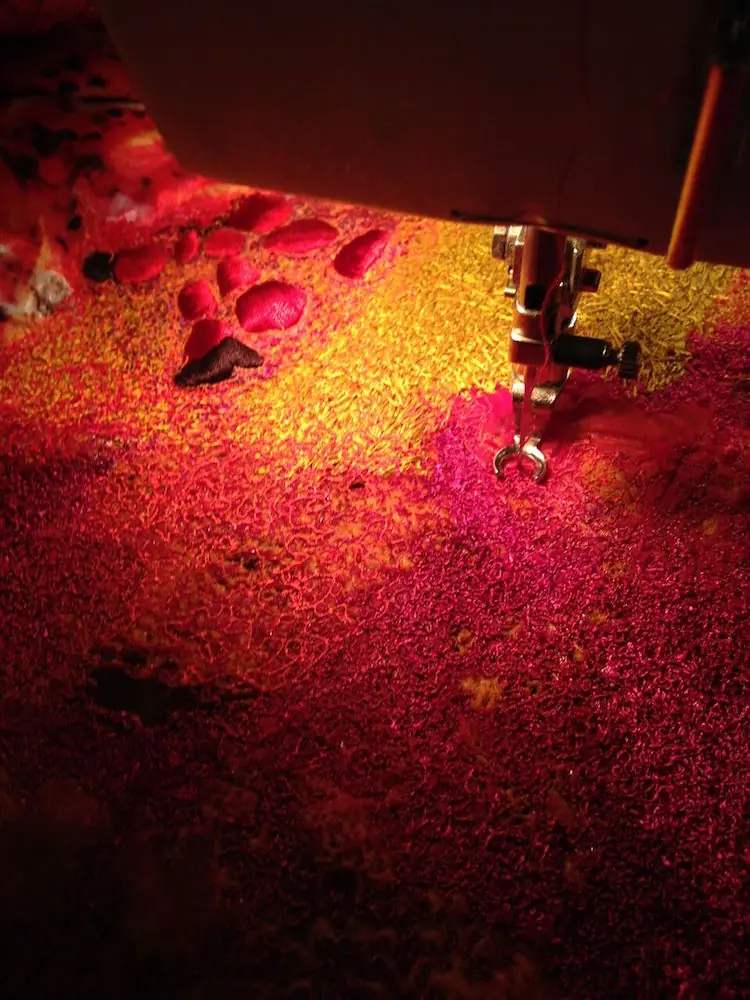
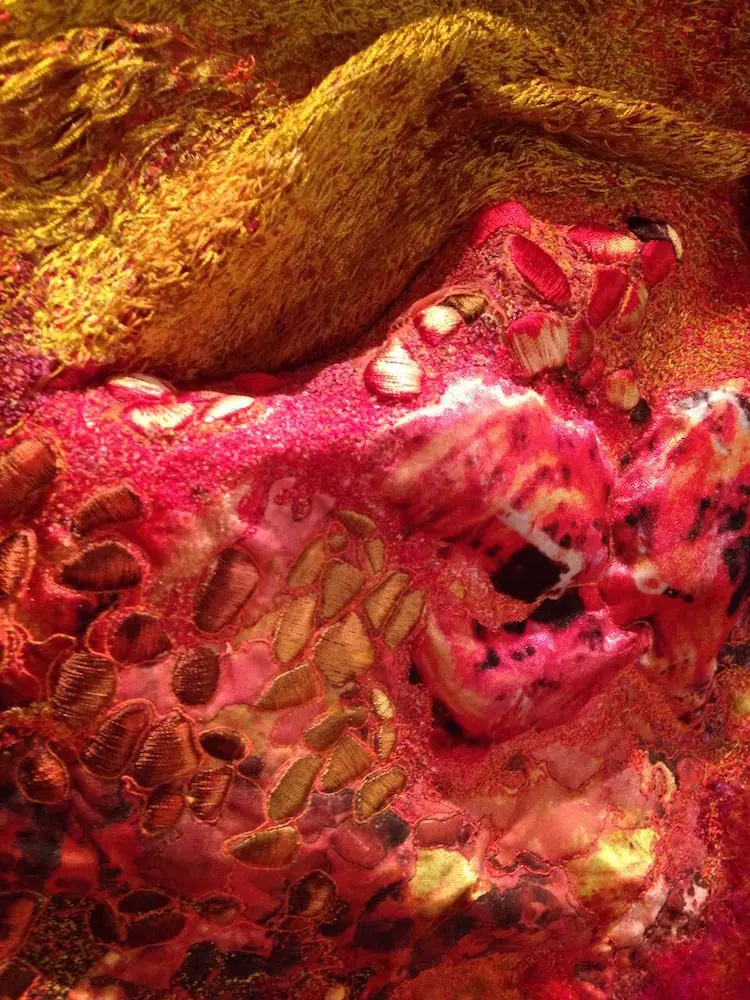
It took from the summer of 2015 to the end of March 2016 to complete, however I wasn’t continuously working on it. I also made another 6 pieces in that time. I often have several being created at the same time and I also travel a lot so my studio time is frequently interrupted.
What journey has the piece been on since its creation
Rust-rose was finished at the end of March this year. It can be seen at the Festival of Quilts NEC Birmingham 11th-14th August where it was juried into Fine Art Quilt Masters.
It has also been Juried into World Of Threads Oakville Canada October 29-November 27th and is to be included in a new book available in the spring of 2017 Dimensional Cloth Art by Contemporary Textile Artists by Andra Stanton Published by Schiffer .
For more information visit: www.suehotchkis.com or Facebook
Let your friends know about this artist’s work by sharing the article on social media. It’s easy – click on the buttons below!


Comments